Get your API Key
Accept Terms of Service
For testing purposes you can accept the terms of service by yourself, for production purposes you should make your customer that is being created as a customer to accept the terms.
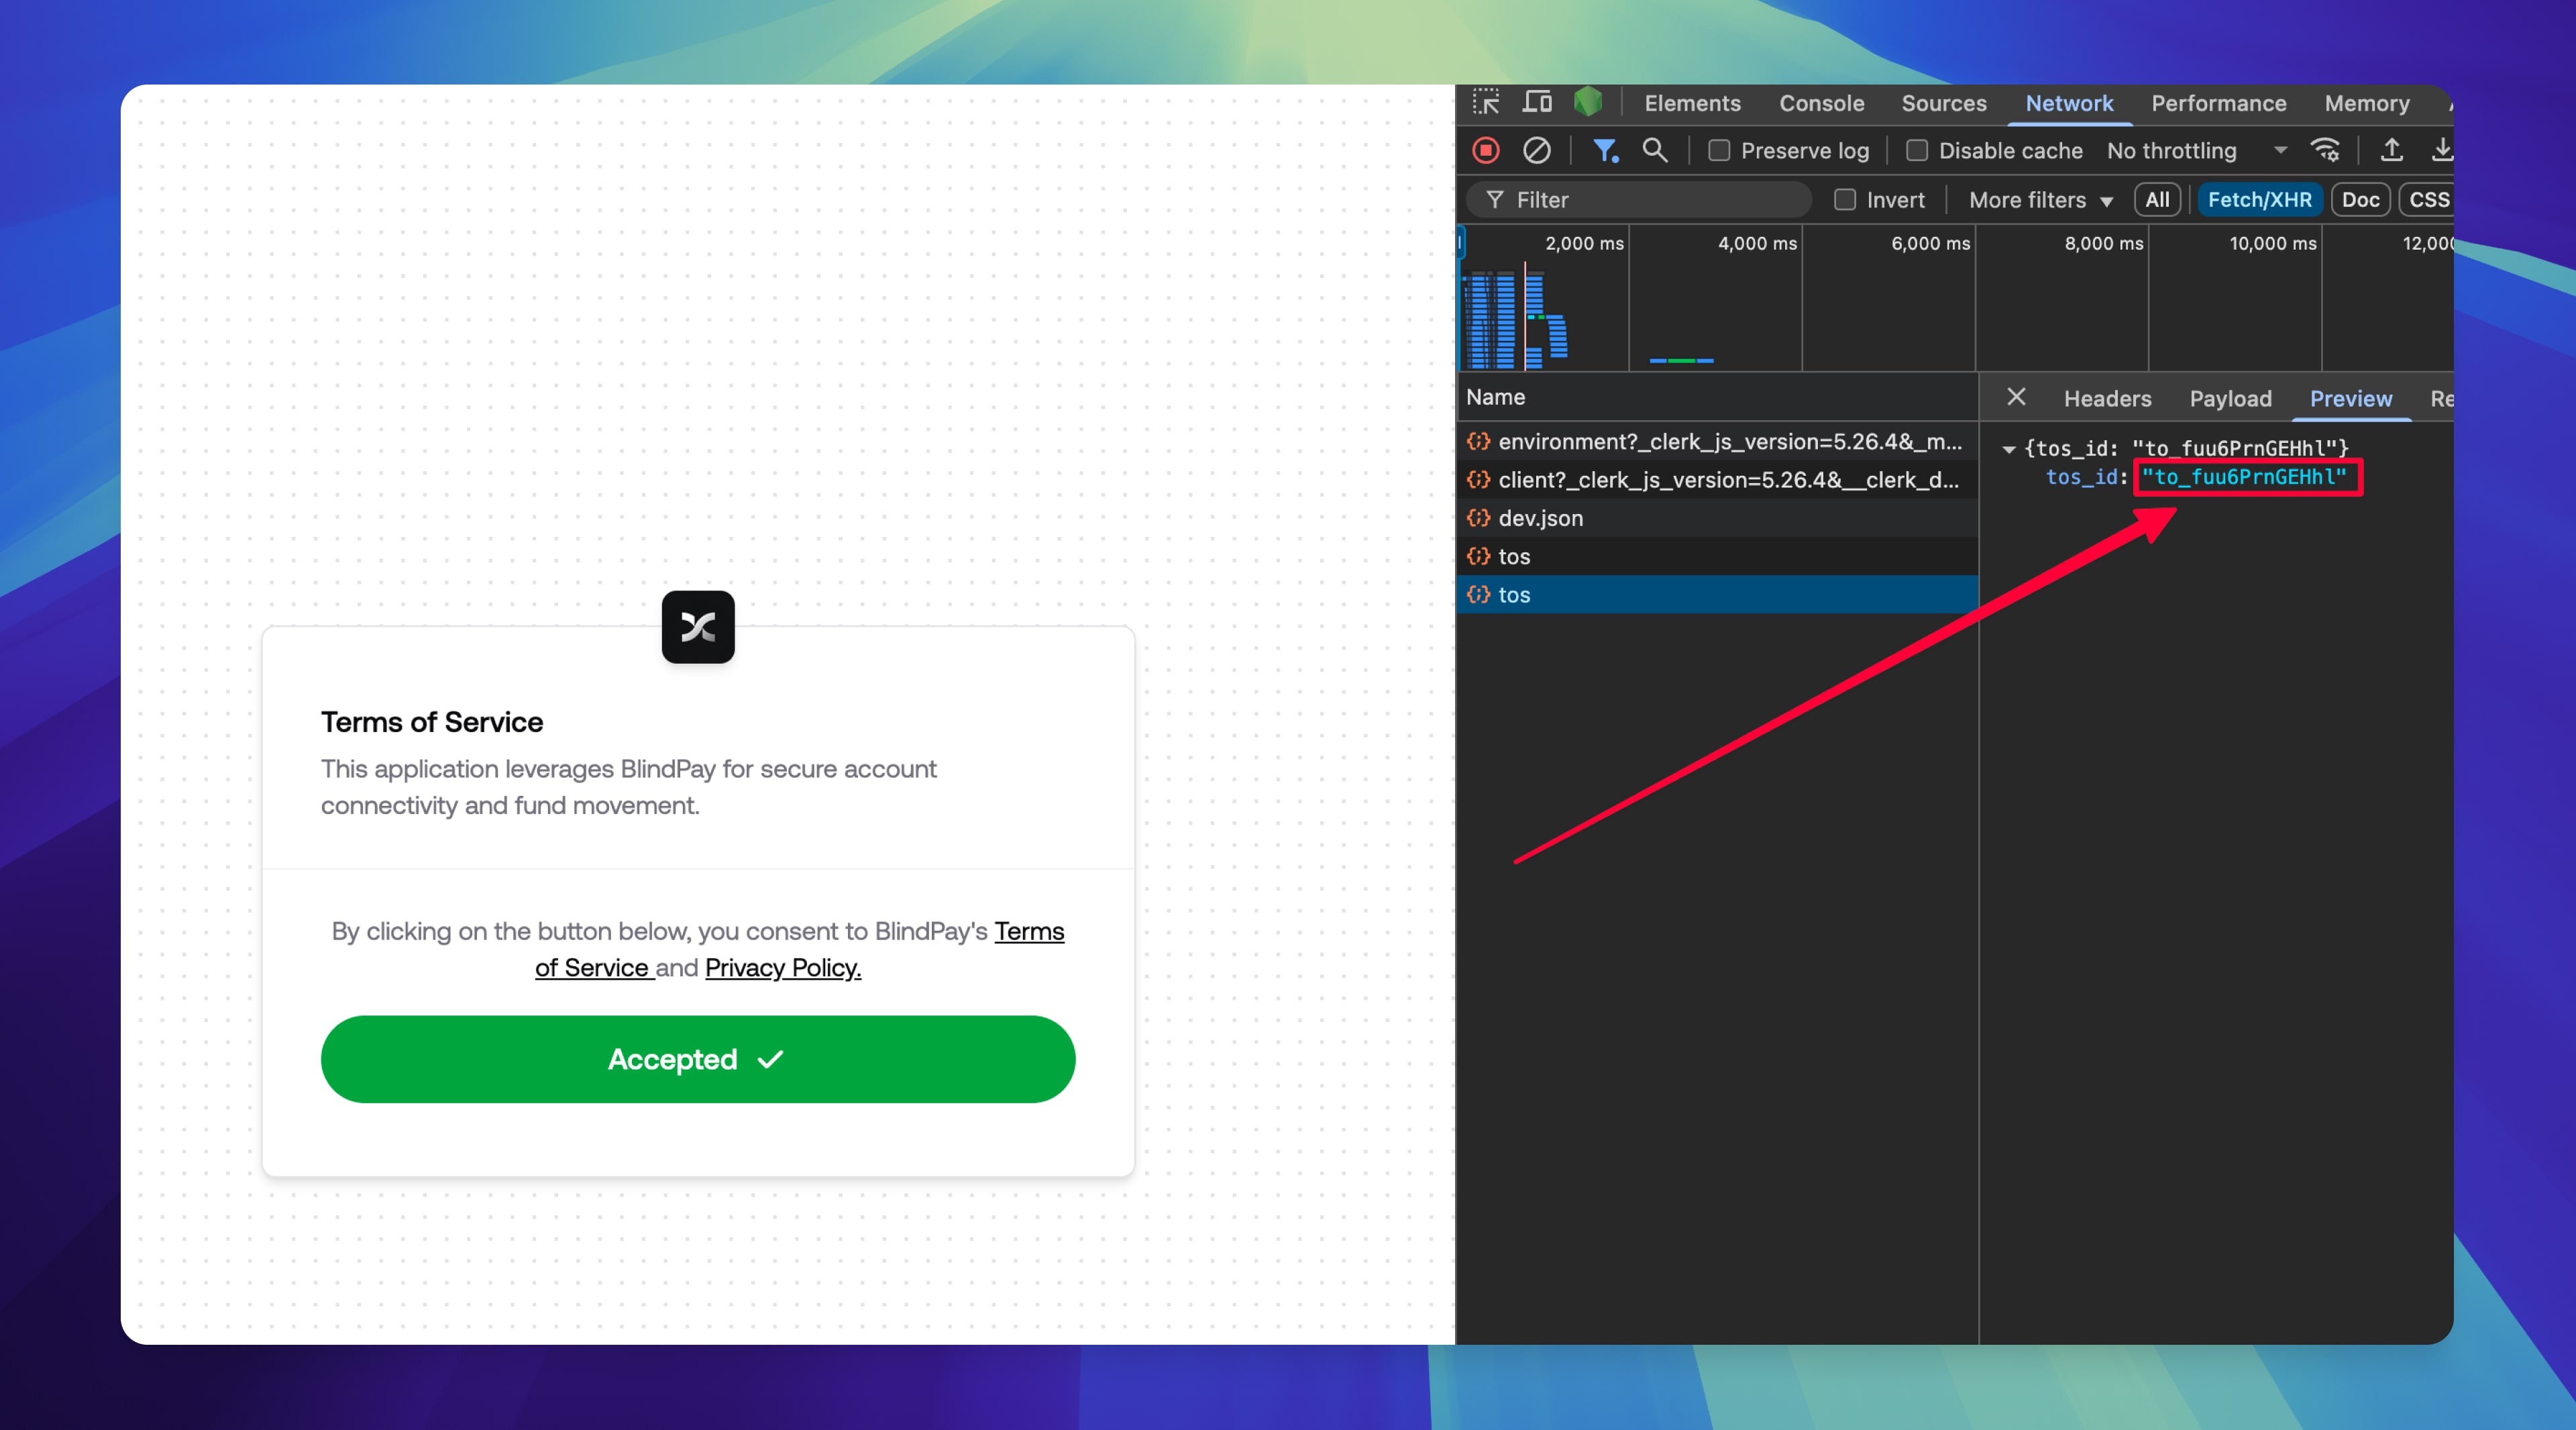
YOUR_SECRET_TOKEN with your API key and in_000000000000 with your instance ID. After you get the url, please open it in your browser, accept the terms and get the tos_id following the image below. This tos_id is necessary for creating customers.
Create a Customer
Run the code below in your terminal to create a new customer.
All customers on development instances will be automatically approved by our KYC.
Add a Bank Account
In this example we're going to add an existing ACH bank account from the US.
This account should be a valid one, so please replace beneficiary, routing_number and account_number with your own information.
YOUR_SECRET_TOKEN with your API key and in_000000000000 with your instance ID, and re_000000000000 with your customer ID. Create a Payout on Base Sepolia Testnet
In this step we're going to use a default express.js server to create a payout on Base Sepolia Testnet.
Before start, please ensure you have Node.js installed.
Now create a folder called blindpay-api-example. Inside the folder, please run the following command:
And now install the dependencies:
Now create a file called index.js inside it, paste the code below and replace the values with your own.
Remember: replace walletPrivateKey with the private key from the wallet you minted the USDB on the first step.
Now run you can run the code using the following command:
You can now access the application at http://localhost:3000 to see the result.